
Vinegar etching is done simply by immersing an egg in a jar of white vinegar. The vinegar reacts with the calcium on the eggshell and breaks it down, to where the outer layer of the eggshell can be rubbed off, revealing the under-layer.
I get a lot of inquiries about my vinegar etched eggs, so I thought I’d share my technique.
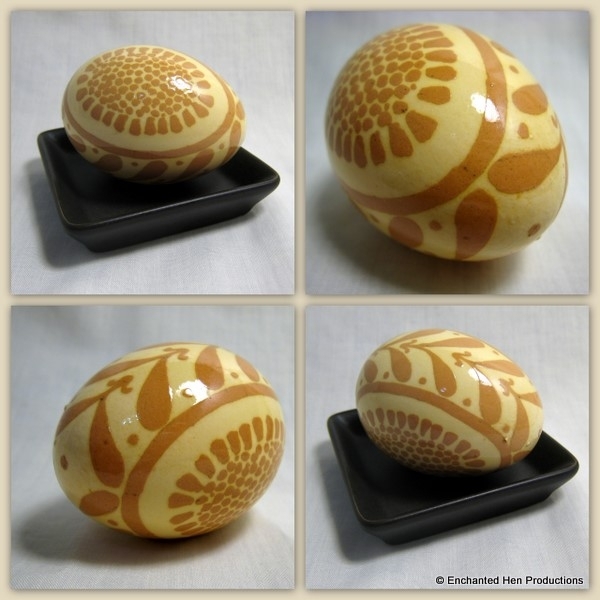
This works especially well with brown eggs. The darker the better. Although I have seen some lovely vinegar-etched white eggs, giving them an embossed appearance.
The common technique is to write on the un-dyed brown eggshell with the kistka, and then dip it into vinegar for about 5 minutes or until you see the bubbles of the reaction start to form. Then lift it out, and brush it with an old toothbrush to remove the un-waxed surface. The shell underneath will be much lighter. If you want to go even whiter, you can give the egg another vinegar bath. But be careful, because each bath makes the shell thinner. Remove the wax as usual.
A more interesting technique (and the one I have been playing with) is to finish a pysanka, with all the colors, all the way to the final dark dye bath. THEN do the vinegar bath. You can either leave it with a white background, or (and this is fun) dip it quickly into a royal blue dye, and it will make a beautiful bright blue color.
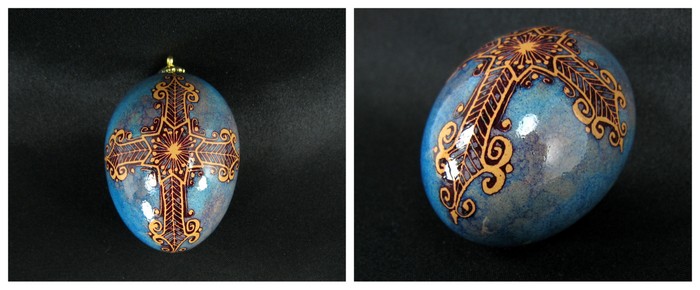
In the image above, I did a very light-touched rub when I removed the dissolved shell surface. I used a paper towel instead of a toothbrush, and ‘blotted’ the area to pull off small amounts of the dissolved shell. I allowed some residue to remain at the edges and corners of the design and then gave it a quick dip in the royal blue. The residue shell turned very dark and the rubbed areas went bright blue. This created the dark edges and gave it a little bit of depth.
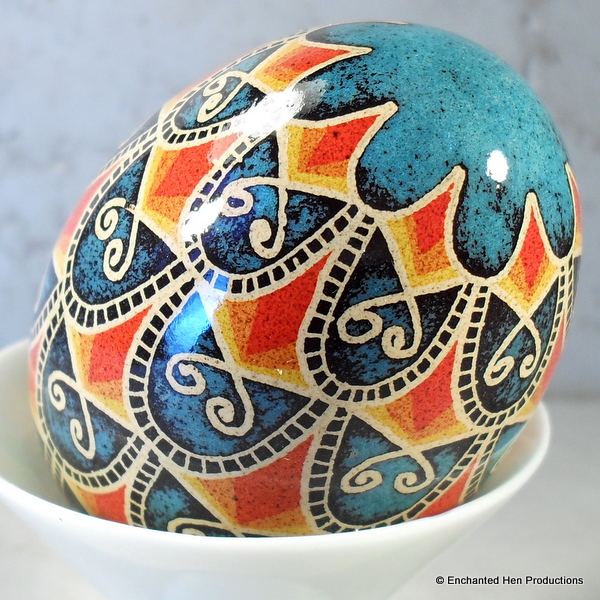
Other colors: Dipping a vinegar etched egg quickly into black, makes an interesting ‘stone’ like effect. Green comes out like new spring leaves. Pink comes out as a really pretty pale pink. Pumpkin over pink creates a beautiful peach-coral color.
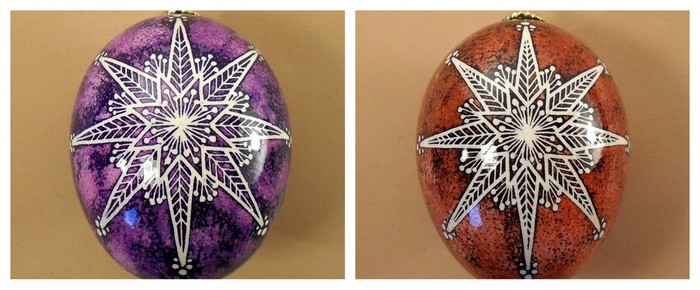
For single-color eggs, I like to experiment with the removal of the shell surface, blotting it instead of rubbing it, to leave some of the dark color behind. This creates an antique effect that I just love. The ‘wrought iron’ design of the Ornate Cross egg in the top picture is especially adaptive to the blotting technique. Below are some “Christmas Star” eggs I made as ornaments using the same blotting technique.
Just a note – when I say ‘dipping it quickly’ into the dye, I’m not kidding. In and out – one second. That’s all it takes.
If you would like to learn how to do this, see my Step-by-step tutorial: Vinegar Etching an Egg
Have fun!